WordPress 的需求建議 https://wordpress.org/about/requirements/ 裡面有提到要使用 https ,所謂的 https 就是 http with SSL (Secure Sockets Layer) 或是 TLS (Transport Layer Security) 還要加上 CA.
先來了解一下什麼是 SSL (Secure Sockets Layer) ?
SSL (Secure Socket Layer) 是由 Netscape 所提出來的資料保密協定,採用了對稱式 ,One way hash 以及非對稱式加密演算法再加上 CA (Certification Authority) 來確定身份所組合而成的.
- Symmetric Algorithms 對稱式加密,所謂的對稱式加密就是加密以及解密都是使用同一支鑰匙.
- Asymmetric Algorithms 非對稱式或稱公鑰密碼演算法的一種.所謂的非對偁式加密會使用兩把公與私鑰 (Public/Private Key), public key 會當成加密用, Private key 就會當解密用
- One Way Hashes 主要會產生一組固定長度字串 (fingerprint or message digests),這組字串用來比對原資料是否遭到修改.
- CA (Certification Authority) 公正的第三者,主要用來驗證公鑰的真假.
剛剛的 SSL 是怎麼樣應用到 HTTP 協定上,變成 HTTPS 的.
伺服器端有一支對稱式加密的鑰匙要給使用者端,讓接下來的資料都經過加密的方式來傳送,但這隻鑰匙是無法直接透過網路來傳送,所以會使用非對稱式或稱公鑰的方式來傳送剛剛說的那一支對稱式加密的鑰匙.
另一個問題是使用者端也無法確定伺服器端的真假,所以會使用 CA (Certification Authority) 的方式來確認伺服器端的身份.
我們來看一下 HTPS (SSL) 的交易方式.
- 伺服器端會給使用者端 公鑰(用來加密使用者端的對稱式加密鑰匙) 與 數位簽名的憑證(身份確認).
- 使用者端接到數位簽名的憑證,會先去 Root CA 詢問資料是否真的由該網站所核發.
- 伺服器端 使用私鑰將這對稱式加密的鑰匙加密傳送,使用者端再用公鑰將資料解密還原成原本的對稱式加密的鑰匙.
- 等到伺服器端使用者端都有對稱式加密的鑰匙後,就使用這對稱式加密的鑰匙來進行接下來的資料傳送與交易.
那 TLS (Transport Layer Security) 是什麼呢!
IETF 將 SSL 標準化,並稱之為 TLS(Transport Layer Security)
測試環境為 Ubuntu16.04 x86_64 + Apache2 (虛擬機)
HTTPs 伺服器端需要 1. Root CA 給的 數位簽名憑證 與 2. 公私鑰非對偁式加密鑰匙 3.對偁式加密鑰匙 ,才能讓 http 伺服器端進行 SSL 加密.
我們只需要做的工作只有第一點,其他 2 ,3 Apache2 會自行處理.
建立 Root CA (Certification Authority)
如何獲得 Root CA (Certification Authority) 給的數位簽名憑證, 數位簽名憑證採用的是 X.509,是由上至下階層式的評證制度.Serer 必須付費給 Root CA 才能使用.
所以這邊簡單做個實驗,我們建立屬於自己的 Root CA 並發數位憑證給自己.因為不是公正的第三方,所以使用者端的瀏覽器需要使用者自行決定是否要信任這個網站.
檔案建議儲存路徑為 /etc/ssl .
root@ubuntu:~# openssl req -new -x509 -sha256 -days 365 -nodes -out /etc/ssl/certs/example.com.crt -keyout /etc/ssl/private/example.com.key
Generating a 2048 bit RSA private key
.........................................................................+++
...................................................+++
writing new private key to '/etc/ssl/private/example.com.key'
-----
You are about to be asked to enter information that will be incorporated
into your certificate request.
What you are about to enter is what is called a Distinguished Name or a DN.
There are quite a few fields but you can leave some blank
For some fields there will be a default value,
If you enter '.', the field will be left blank.
-----
Country Name (2 letter code) [AU]:TW
State or Province Name (full name) [Some-State]:TAIWAN
Locality Name (eg, city) []:Taipei
Organization Name (eg, company) [Internet Widgits Pty Ltd]:Benjr
Organizational Unit Name (eg, section) []:Benjr
Common Name (e.g. server FQDN or YOUR name) []:benjr.tw
Email Address []:admin@benjr.tw
依據網站內容填寫憑證申請書的內容.
- Country Name (2 letter code) : 國家代碼,台灣是 TW
- State or Province Name (full name) : 省份,你可以直接填台灣 Taiwan
- Locality Name (eg, city) : 城市名,你可以填台北 Taipei
- Organization Name (eg, company) : 你的組織名稱,通常是公司,我這裡填的是 benjr
- Organizational Unit Name (eg, section) : 如果你剛填的是公司,那這就是公司部門的名稱
- Common Name (e.g. server FQDN or YOUR name) : 如果是伺服器憑證那就填上伺服器的全名(benjr.tw) .若是 E-mail 憑證那就填上 E-mail.Root CA 填上組織名稱加上 RSA/2048 以供辨識.
- Email Address :這裡請填上你的 e-mail 信箱
- A challenge password : 申請書的密碼,也可以不用設
- An optional company name : 代辦憑證的公司名稱,也可以不用設
剛剛的指令做了三件事情.
- 製作 Root CA Private Key
指令會產生 2048 bits 的 Private Key (RSA 為非對稱式或稱公鑰密碼演算法) ,名稱為 example.com.key ,也可以單獨使用下面指令來產生.root@ubuntu:~# openssl genrsa -out /etc/ssl/private/example.com.key 2048
建立私鑰後最好將權限加以設限,以免被其他使用者取用.
root@ubuntu:~# chmod 400 /etc/ssl/private/example.com.key
你可以用下面的指令來看 RSA 產生的 Private Key 內容.
root@ubuntu:~# openssl rsa -noout -text -in /etc/ssl/private/example.com.key
Private-Key: (2048 bit)
modulus:
略...
publicExponent: 65537 (0x10001)
privateExponent:
略...
prime1:
略...
prime2:
略...
exponent1:
略...
exponent2:
略...
coefficient:
略...
- 填寫憑證申請書+簽發憑證
前面指令直接產生 example.com.csr (憑證申請書) ,並立即簽發憑證給自己 example.com.crt (憑證) 也可以單獨使用下面指令來產生.
正常步驟是需要給 Root CA 做簽合.root@ubuntu:~# openssl req -new -key /etc/ssl/private/example.com.key -out /etc/ssl/certs/example.com.csr
root@ubuntu:~# openssl x509 -req -days 365 -signkey /etc/ssl/private/example.com.key -in /etc/ssl/certs/example.com.csr -out /etc/ssl/certs/example.com.crt
建立憑證後最好將權限加以設限,以免被其他使用者取用.
root@ubuntu:~# chmod 400 /etc/ssl/certs/example.com.crt
可以用下面的指令來查看產生的 example.com.crt 憑證內容.
root@ubuntu:~# openssl x509 -noout -text -in /etc/ssl/certs/example.com.crt
Certificate:
    Data:
        Version: 3 (0x2)
        Serial Number: 15367654869432319015 (0xd544e0aeb350bc27)
    Signature Algorithm: sha256WithRSAEncryption
        Issuer: C=TW, ST=TAIWAN, L=Taipei, O=Benjr, OU=Benjr, CN=benjr.tw/emailAddress=admin@benjr.tw
        Validity
            Not Before: Oct 18 01:44:07 2017 GMT
            Not After : Oct 18 01:44:07 2018 GMT
        Subject: C=TW, ST=TAIWAN, L=Taipei, O=Benjr, OU=Benjr, CN=benjr.tw/emailAddress=admin@benjr.tw
        Subject Public Key Info:
            Public Key Algorithm: rsaEncryption
                Public-Key: (2048 bit)
                Modulus:
                略...
                Exponent: 65537 (0x10001)
        X509v3 extensions:
            X509v3 Subject Key Identifier:
            略...
            X509v3 Authority Key Identifier:
            略...
            X509v3 Basic Constraints:
                CA:TRUE
    Signature Algorithm: sha256WithRSAEncryption
略...
可以看到的他的內容包括下列的東西
第一部分是要申請的憑證內容
第二部分是 Public Key
第三部分將剛才的內容(第一二部分)經過 on way hash(如:MD5 , SHA1..)再用他的 Private Key 加密所到的訊息摘要 (Digest Hash) . 這可確定在傳送過程資料不會遭到修改.
編輯 Apache2 https 設定檔
root@ubuntu:~# vi /etc/apache2/sites-available/000-default.conf
<VirtualHost *:443>
       SSLEngine On
#       SSLCertificateFile /etc/ssl/certs/apache-selfsigned.crt
       SSLCertificateFile /etc/ssl/certs/example.com.crt
#       SSLCertificateKeyFile /etc/ssl/private/apache-selfsigned.key
       SSLCertificateKeyFile /etc/ssl/private/example.com.key
       DocumentRoot /var/www/html
       ErrorLog ${APACHE_LOG_DIR}/error.log
       CustomLog ${APACHE_LOG_DIR}/access.log combined
</VirtualHost>
root@ubuntu:~# systemctl restart apache2
瀏覽 HTTPs 網頁
使用 https:// 來開啟網站,但會看到如下的畫面.
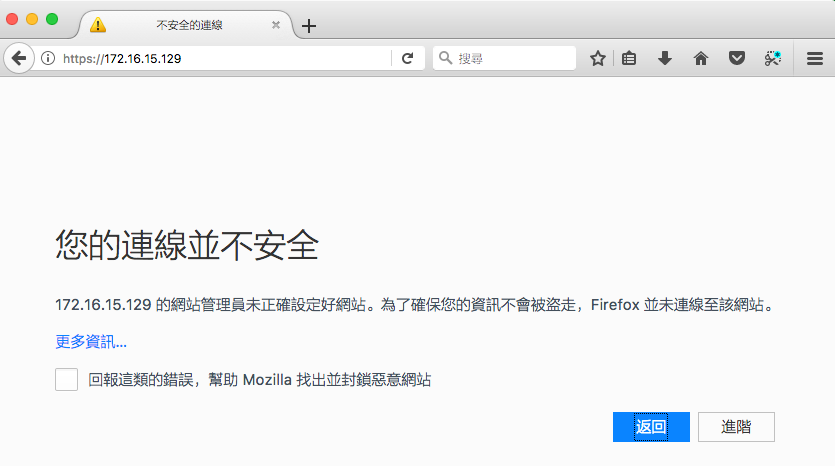
因為 Root CA 是自己(不是公正的第三方)而且並發數位憑證給自己,所以使用者端的瀏覽器需要使用者自行決定是否要信任這個網站.